Character Animation 101: Weighting Your Rig
Our third Learning Animation 101 lesson will focuses on the process of “weighting” your character rig

Welcome back to Learning 2D Character Animation 101! Our third lesson will focus on the process of “weighting” your character rig (read our second lesson on Adding Bones to Your Character here). Now that you’ve added bones to your character, you need to dictate what effect each bone has on the 2D mesh. Weighting is a crucial step for creating a functional rig that yields natural looking animations.
What is Weighting?
Weighting your rig is a process of mapping the influence (in terms of strength and range) each bone has on the surrounding mesh. Without weighting, it is difficult for animation softwares like Creature 2D to determine how the mesh will deform as the skeleton is moved. In the analogy of the character’s bones as an endoskeleton, weighting can (very roughly) be thought of as the muscles, flesh, and ligaments under the skin—defining the relationship between bones and polygons.
Rig weight values are often represented by a color gradient. In Creature 2D, when you select a bone, the strength of its influence on each polygon runs a spectrum from white (100% strength), to gray (50% strength), to black (0% strength).
In the example below, when Pluma’s upper arm is painted white, the mesh stretches naturally as the bone is moved. When the region is painted black, the bone no longer has influence over those polygons and the mesh no longer follows the bone movement: resulting in unsightly warping as the shoulder remains static while the lower arm swings back and forth.
Bones can only move polygons that they have direct influence on. However, due to parenting, moving one bone can lead to movement in a connected bone, which indirectly causes influence on additional mesh regions—this is part of what creates secondary motion. Secondary motion, i.e. motion that is generated in reaction to a primary motion, is essential for creating cascading movement and lifelike animation. This is why properly parenting and weighting your character rig will enable you to create better 2D animations.
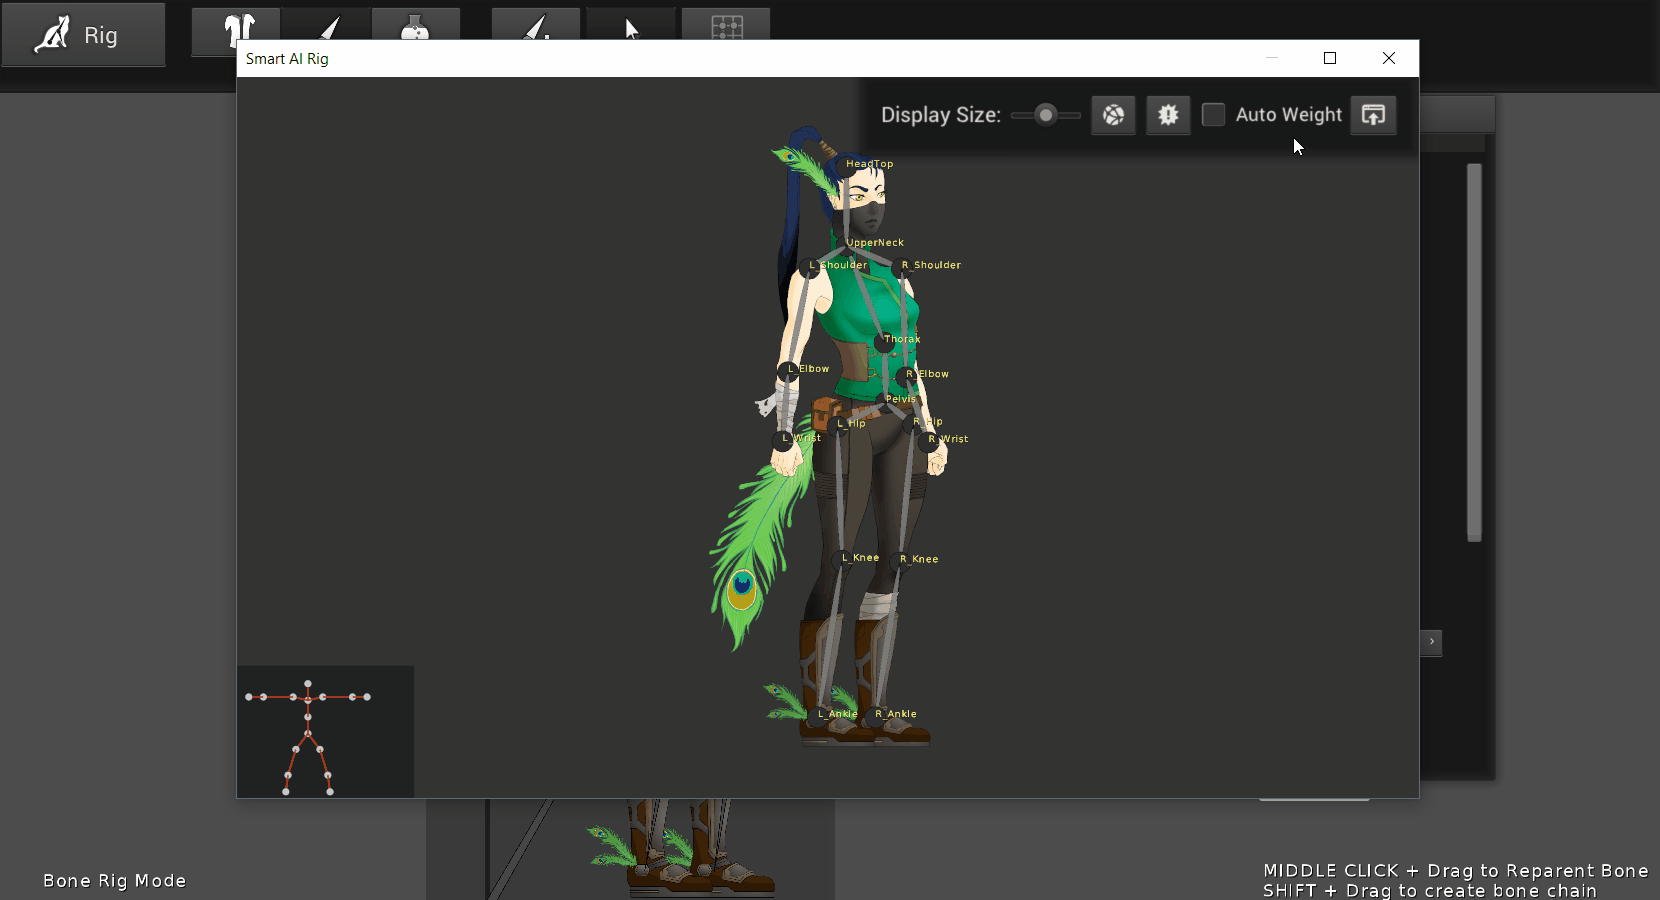
Calibrating the influence of each bone can be a time consuming process. Thankfully, Creature provides intuitive tools that help give you creative control and automate weighting. (If you utilized the auto weights from the Smart AI rig mentioned in our previous lesson then you may already be several steps ahead!)
Let’s get started!
Step-By-Step Guide on How to Weight Your Rig using Creature.
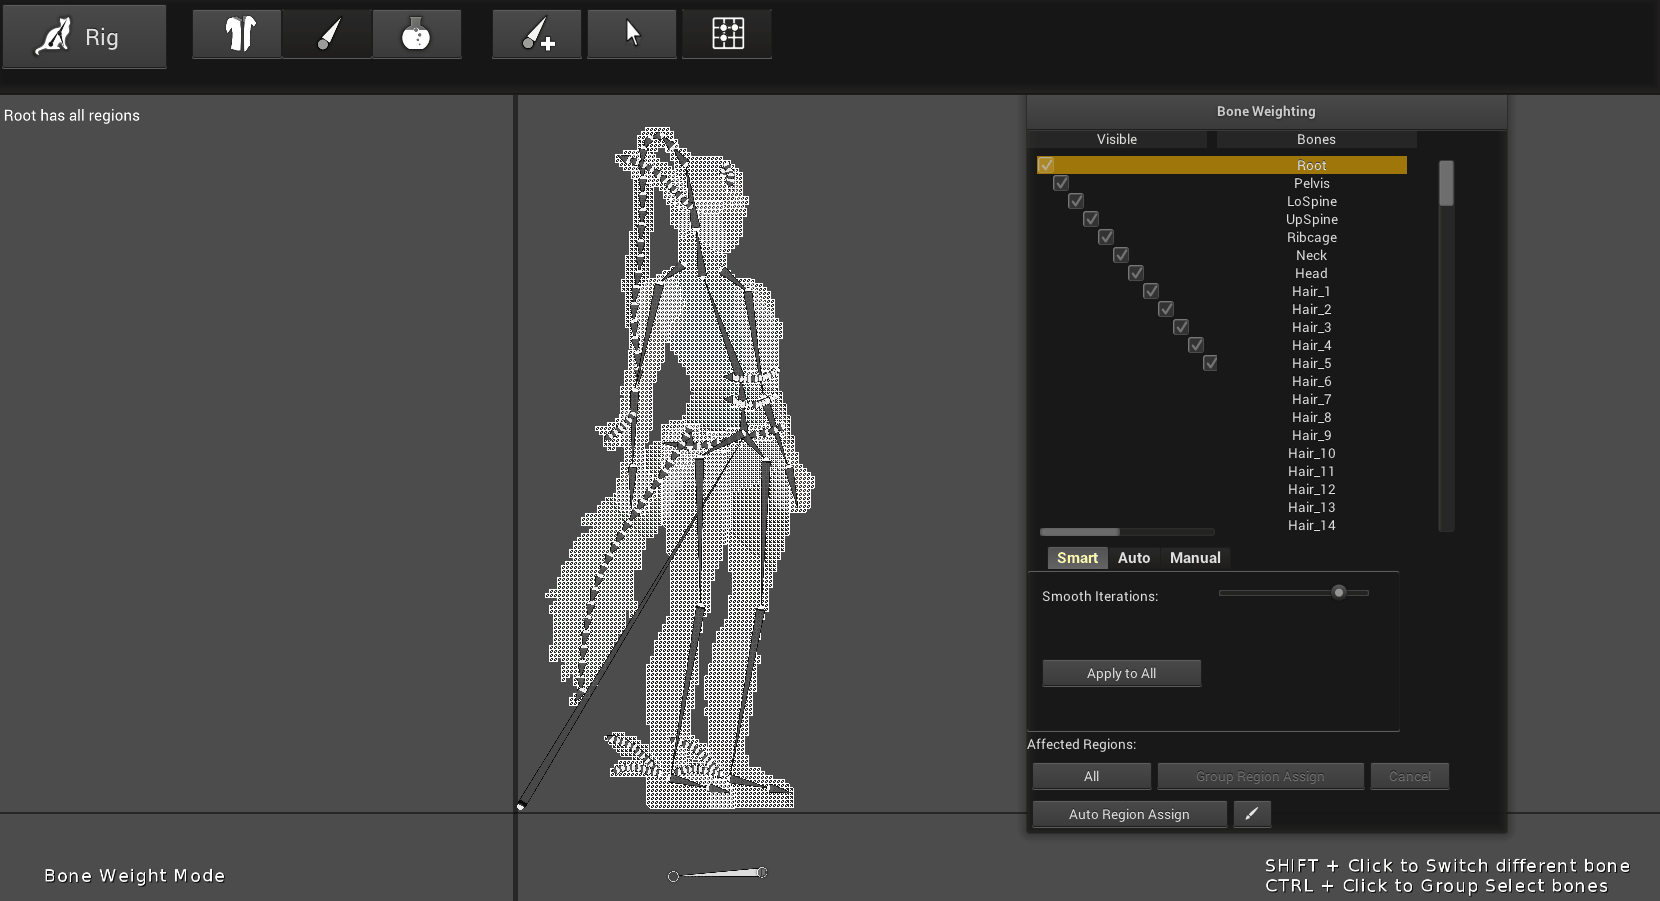
Step 1: Open the Weight Menu
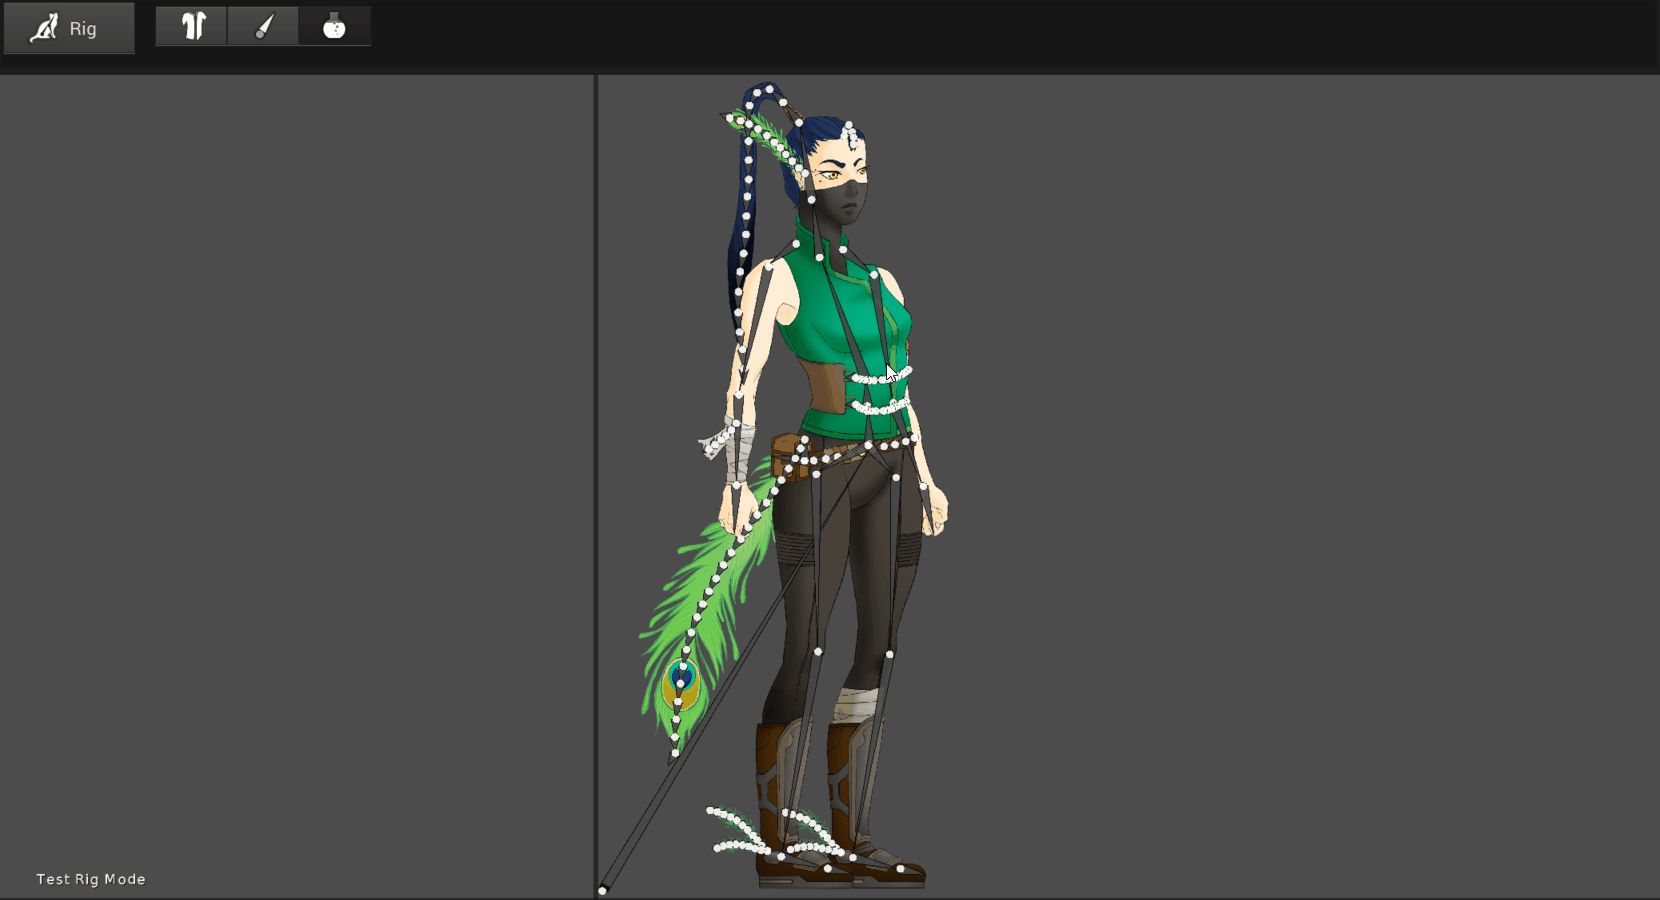
You should still be in Rig Mode from our last lesson. We will now utilize the “Weight” button to add influence to bones in our rig. Prior to selecting the Weight button you need to select a bone to add weights to.
Once you select Weight, your mesh regions will appear one of two ways. If a mesh region is red, that means it is currently not weighted. If you utilized the Auto Weights feature within the Smart AI Rig window, you may find that several of the mesh regions have already been auto-weighted.
Step 2: Auto Assign Regions
It is important to specify which mesh regions you want a bone to have influence over. For example, a foot bone should not affect the upper body mesh regions, or separate items like cloth, feathers, a belt, or hair will move independently from the surrounding polygons.
At the bottom of the “Bone Weighting Window” you will find a few tools to “Region Assign” each bone. Select “Auto Region Assign” for an easy starting place. Creature will determine which regions to assign depending on the 2D meshes overlapping with each bone.
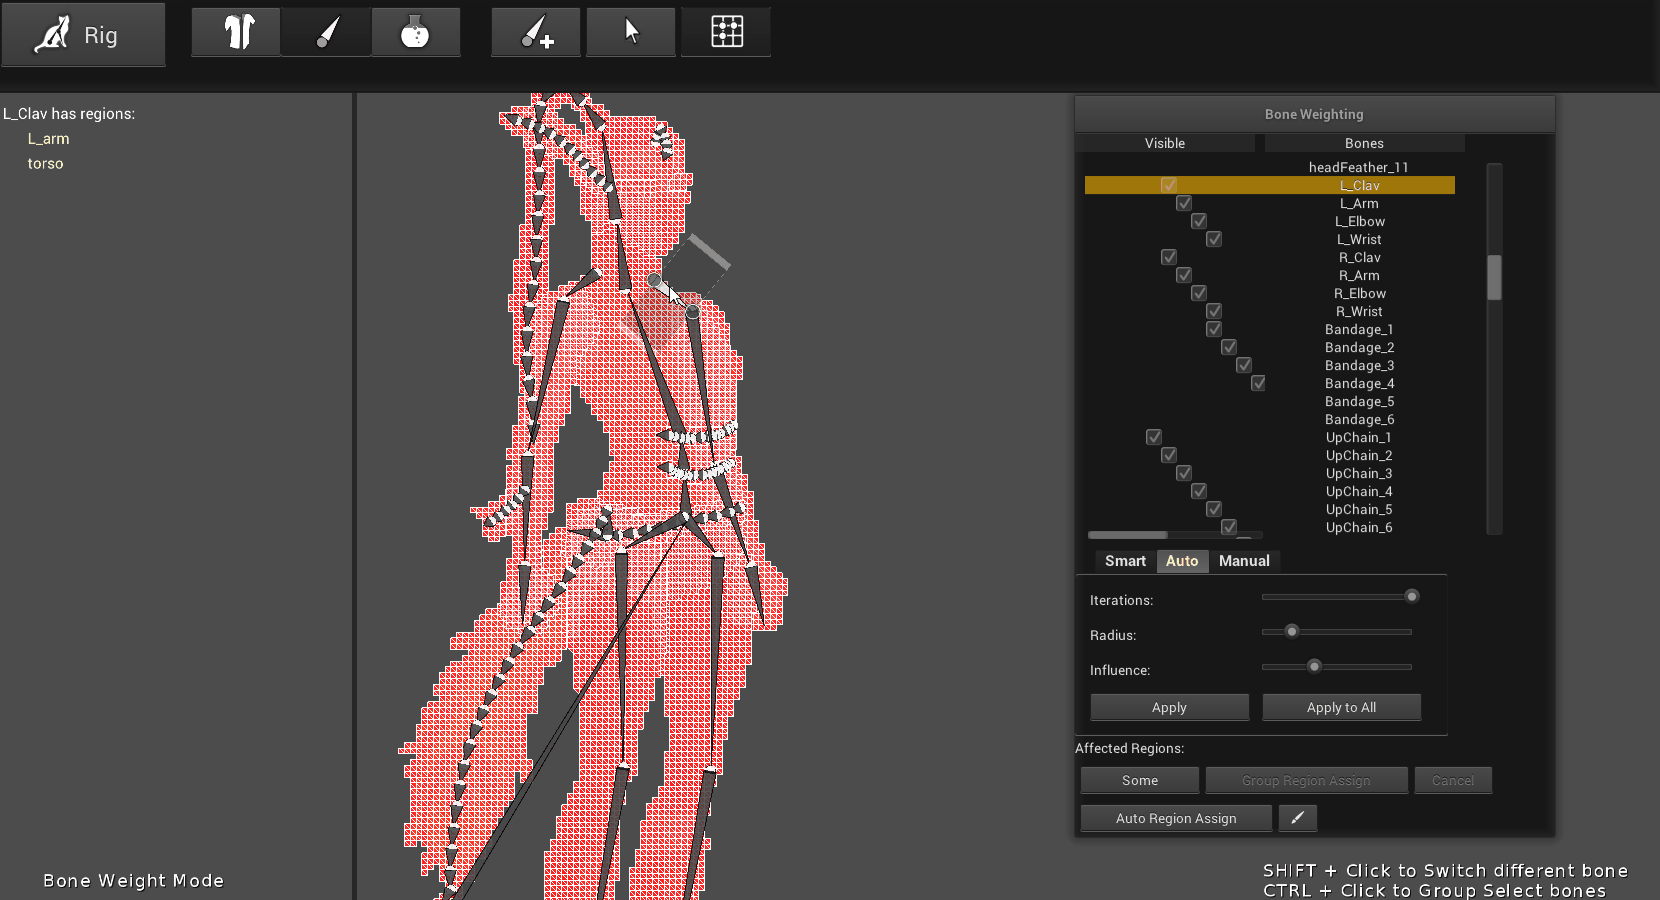
Most of the bones for Pluma only needed to be assigned with one mesh region. The exception to this included the clavicle bones (assigned to arm and torso regions) as well as the hip bones (assigned to leg and torso regions) which bridge the gap between two mesh regions. I had to make a few changes to the assigned mesh regions in order to accomplish this.
Artist’s Note:
In comparison to 3D programs Region Assign is very similar to masking a part of your model but is an extremely useful feature you don’t always see involved with rigging. Often what happens when I am rigging in Maya is that I’ll be applying weights from different angles to my character’s hand and end up accidently weighting a couple of vertices from the legs. Creature gives you the flexibility to Region Assign to as little or as many bones as you need.
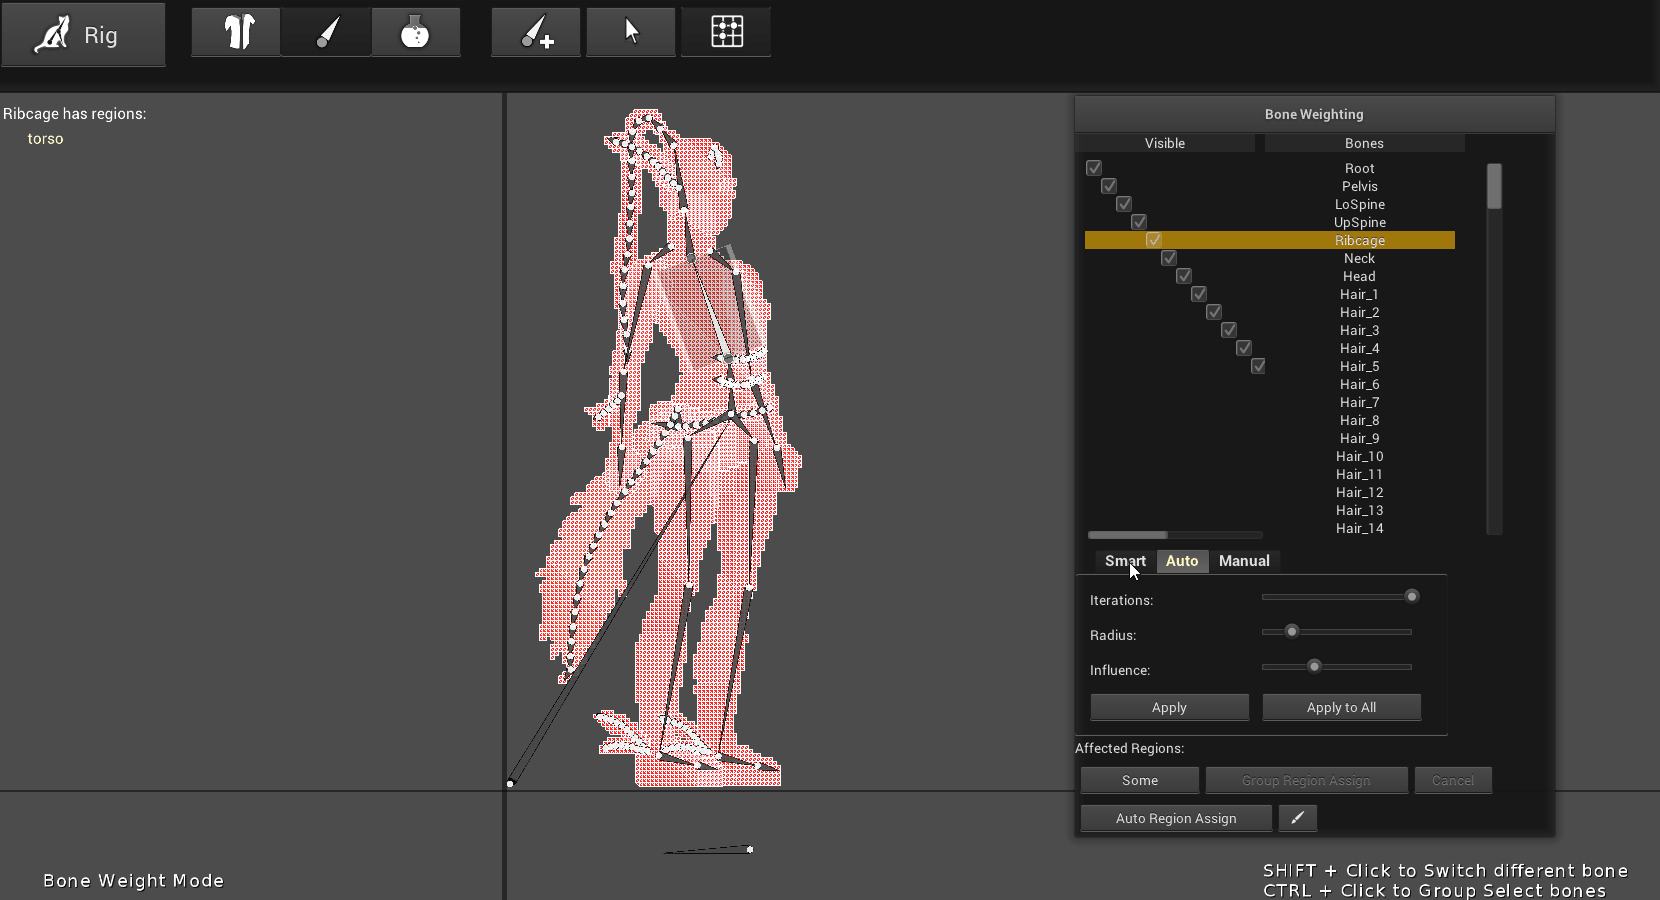
Step 3: Modify Assigned Regions
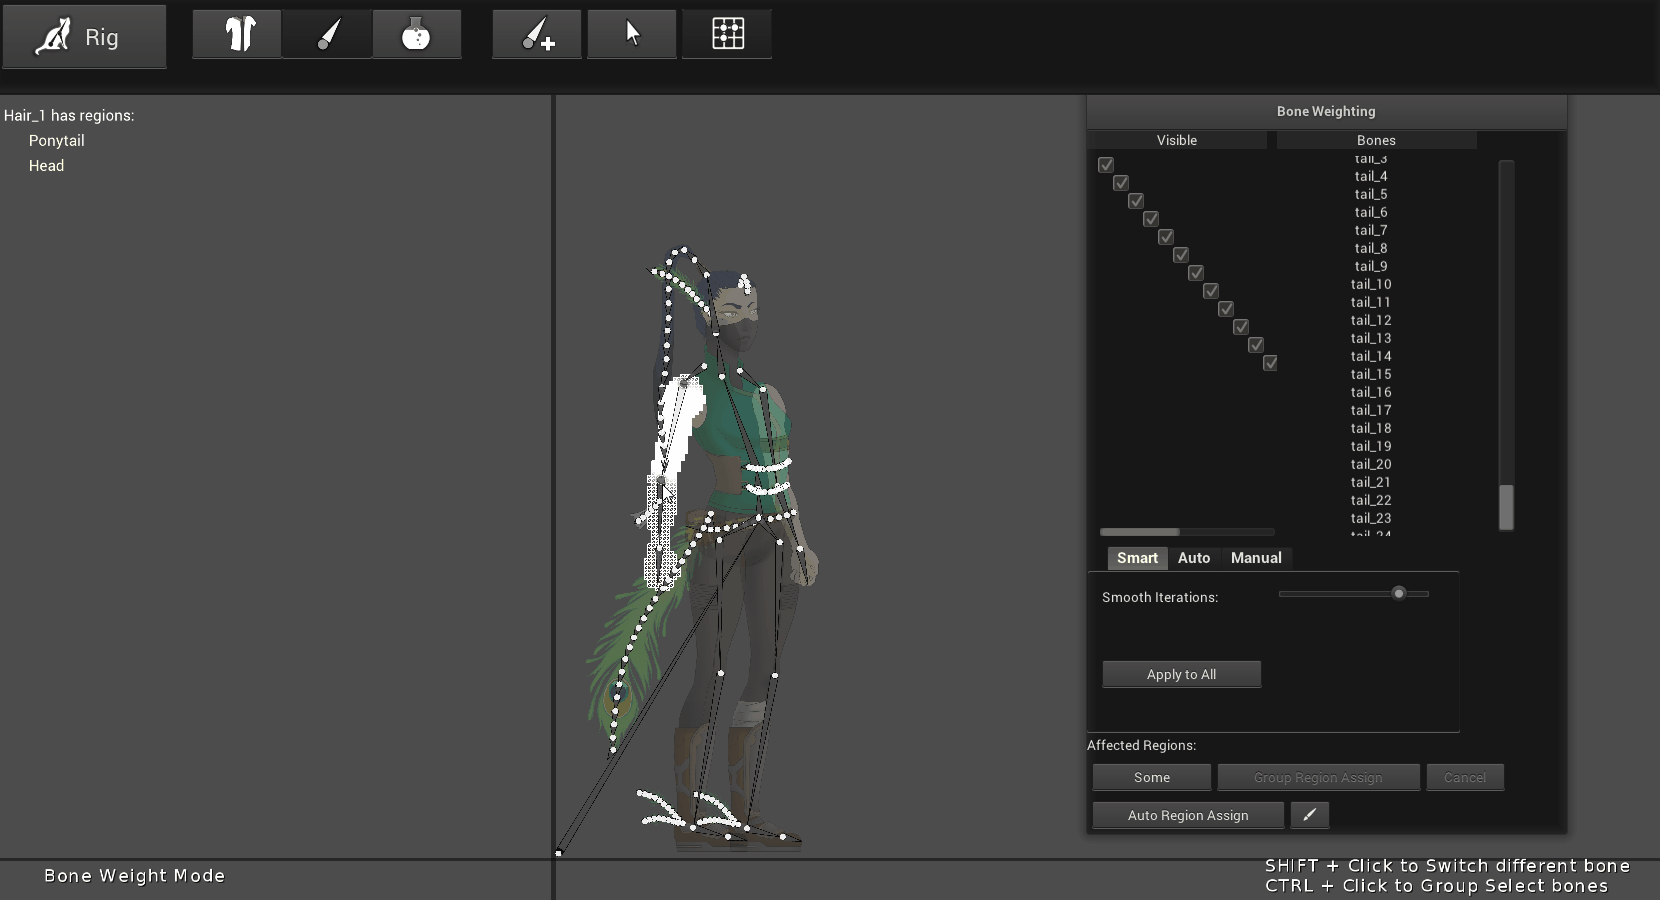
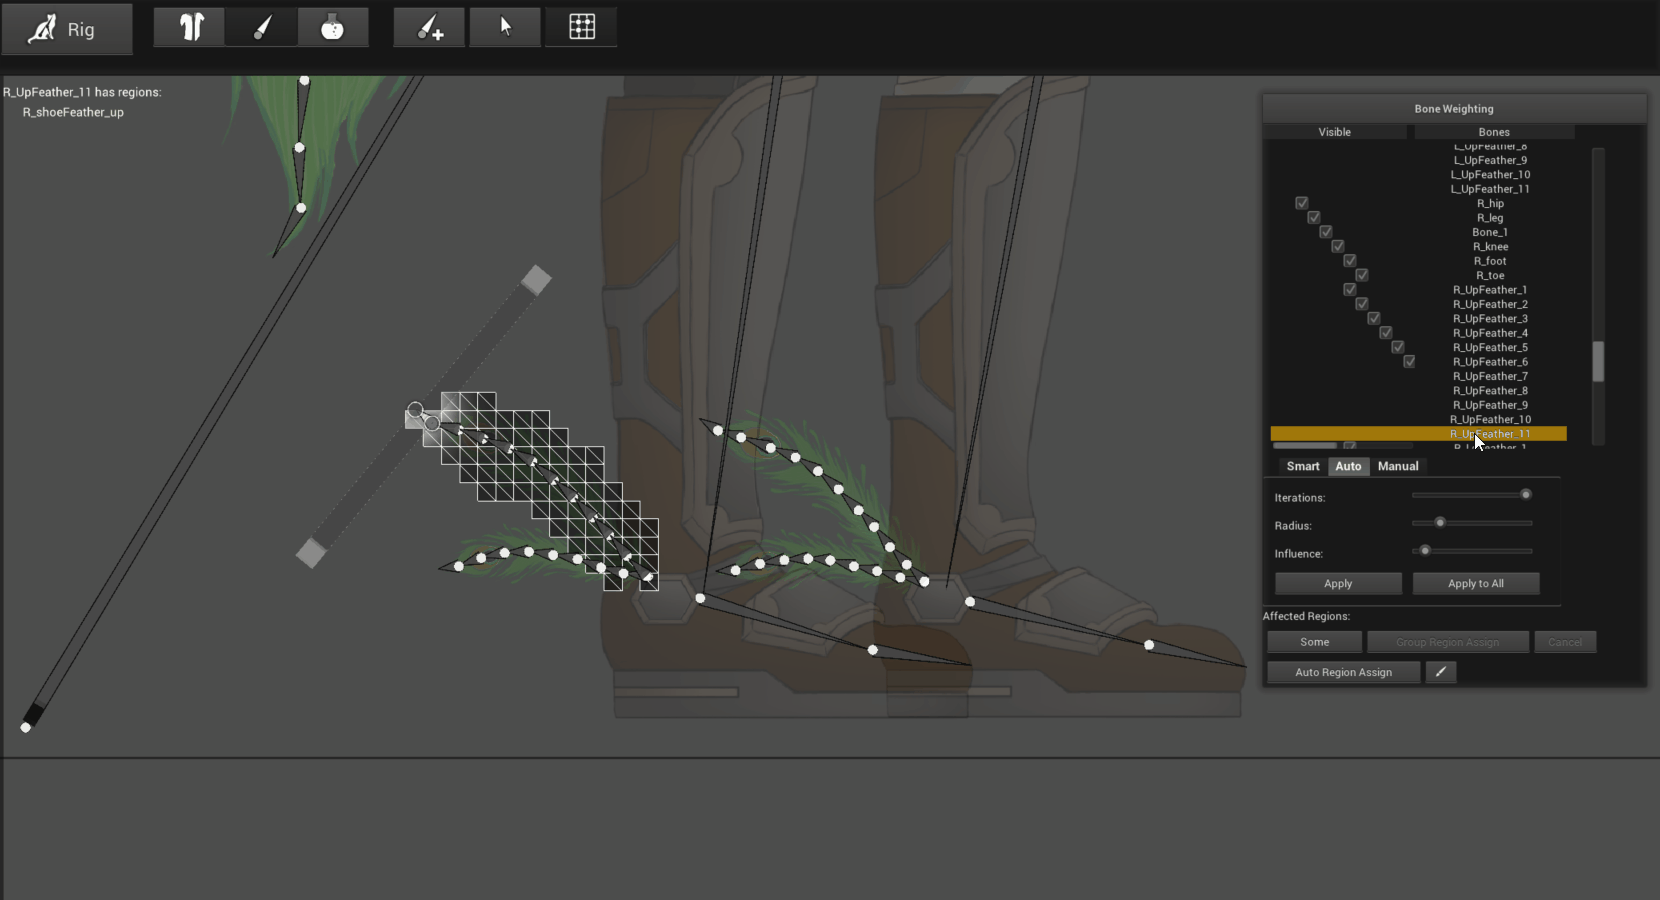
To modify the regions, select the bone and then click “Some” at the bottom of the Bone Weighting Window. This will bring up the “Bone Weight Affected Regions” pop-up allowing you to select or deselect the proper mesh regions for each bone.

For multiple bones that share the same mesh region, select all the bones at once (shift+click) and click “Group Region Assign”. This is great for hair, chains, feathers, and ropes.
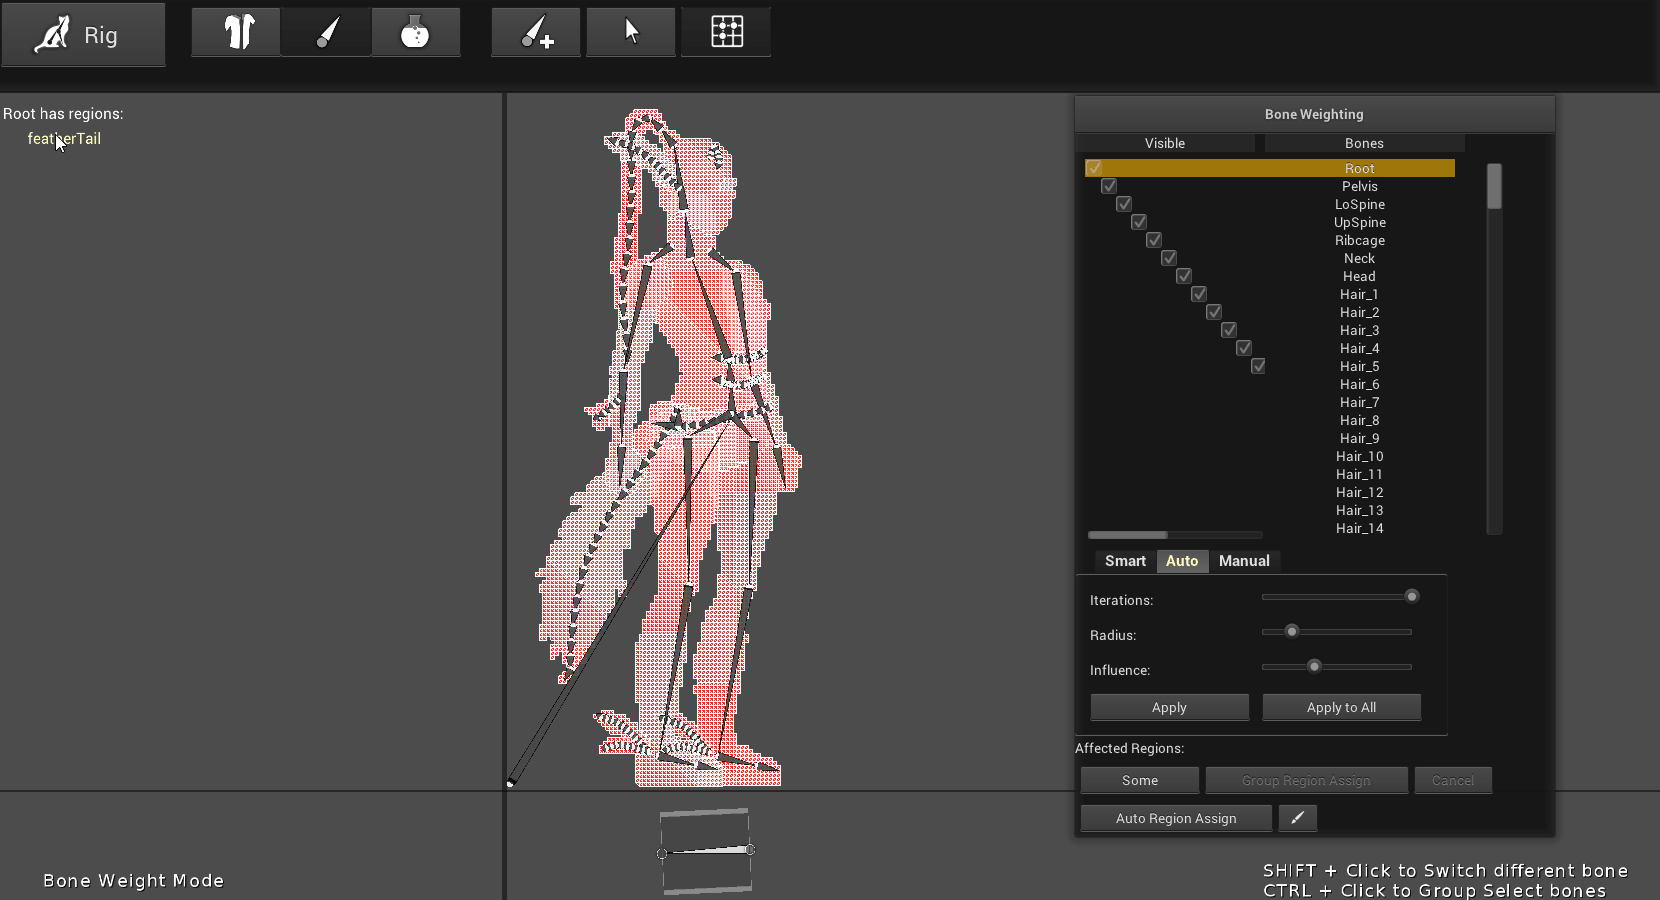
The Root bone should have every mesh region assigned to it. When assigning mesh regions for the Root you can click “Select All” inside the Bone Weight Affected Regions menu.
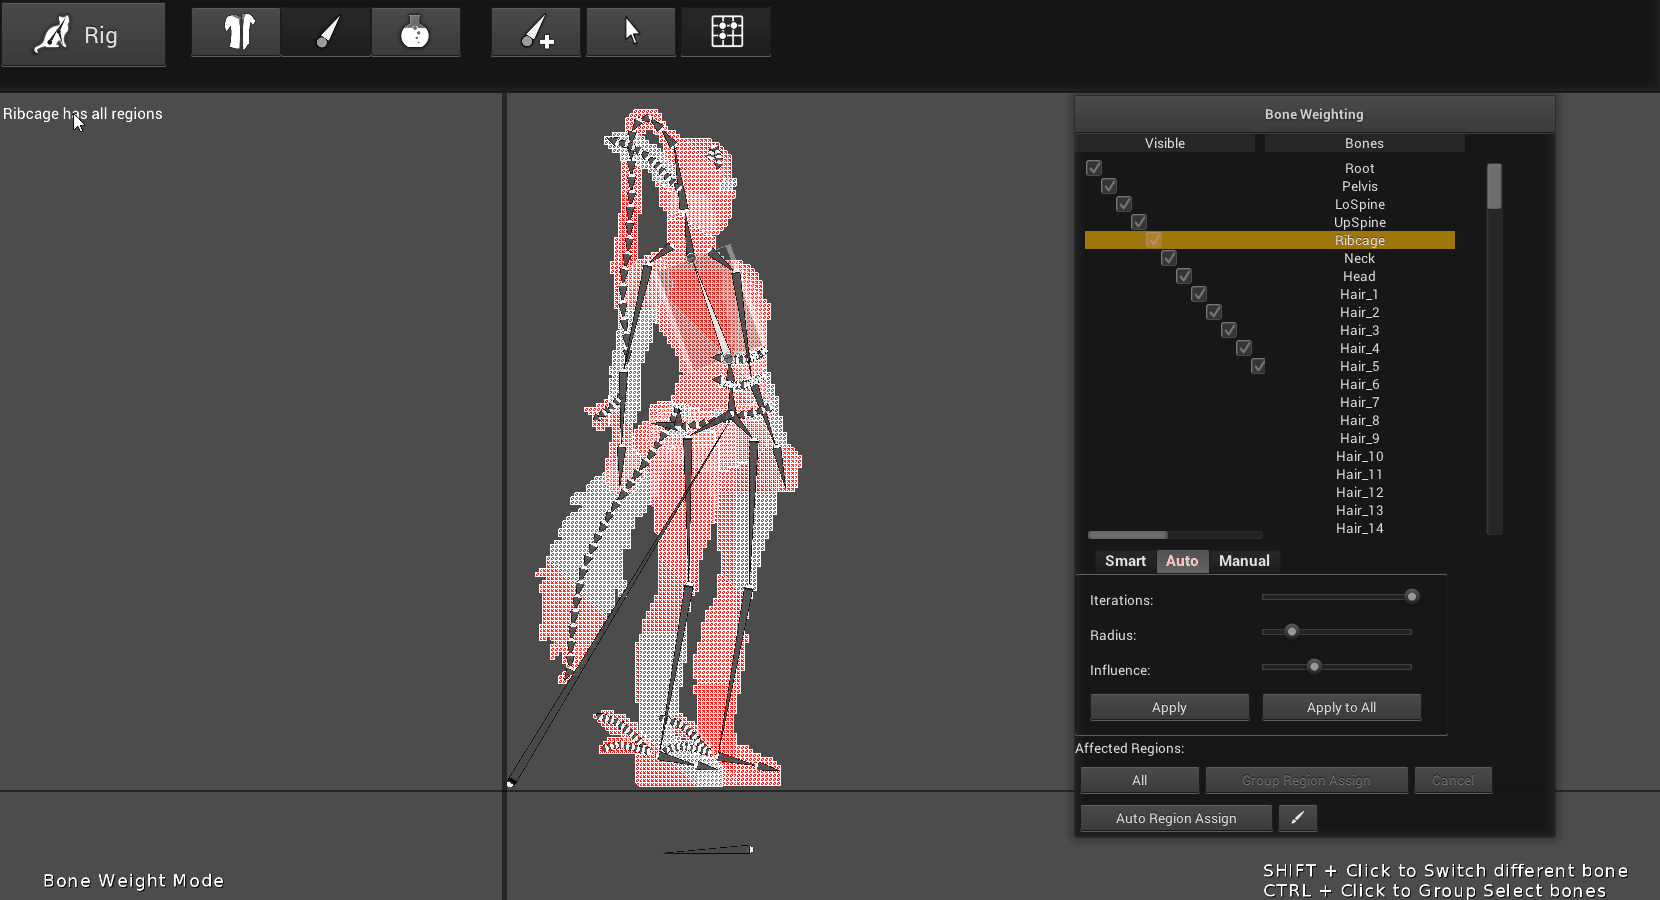
If you find a bone that incorrectly has all mesh regions assigned to it then click on the name of a region within the Bone Weight Affected Regions pop-up and then click “Select Single”.
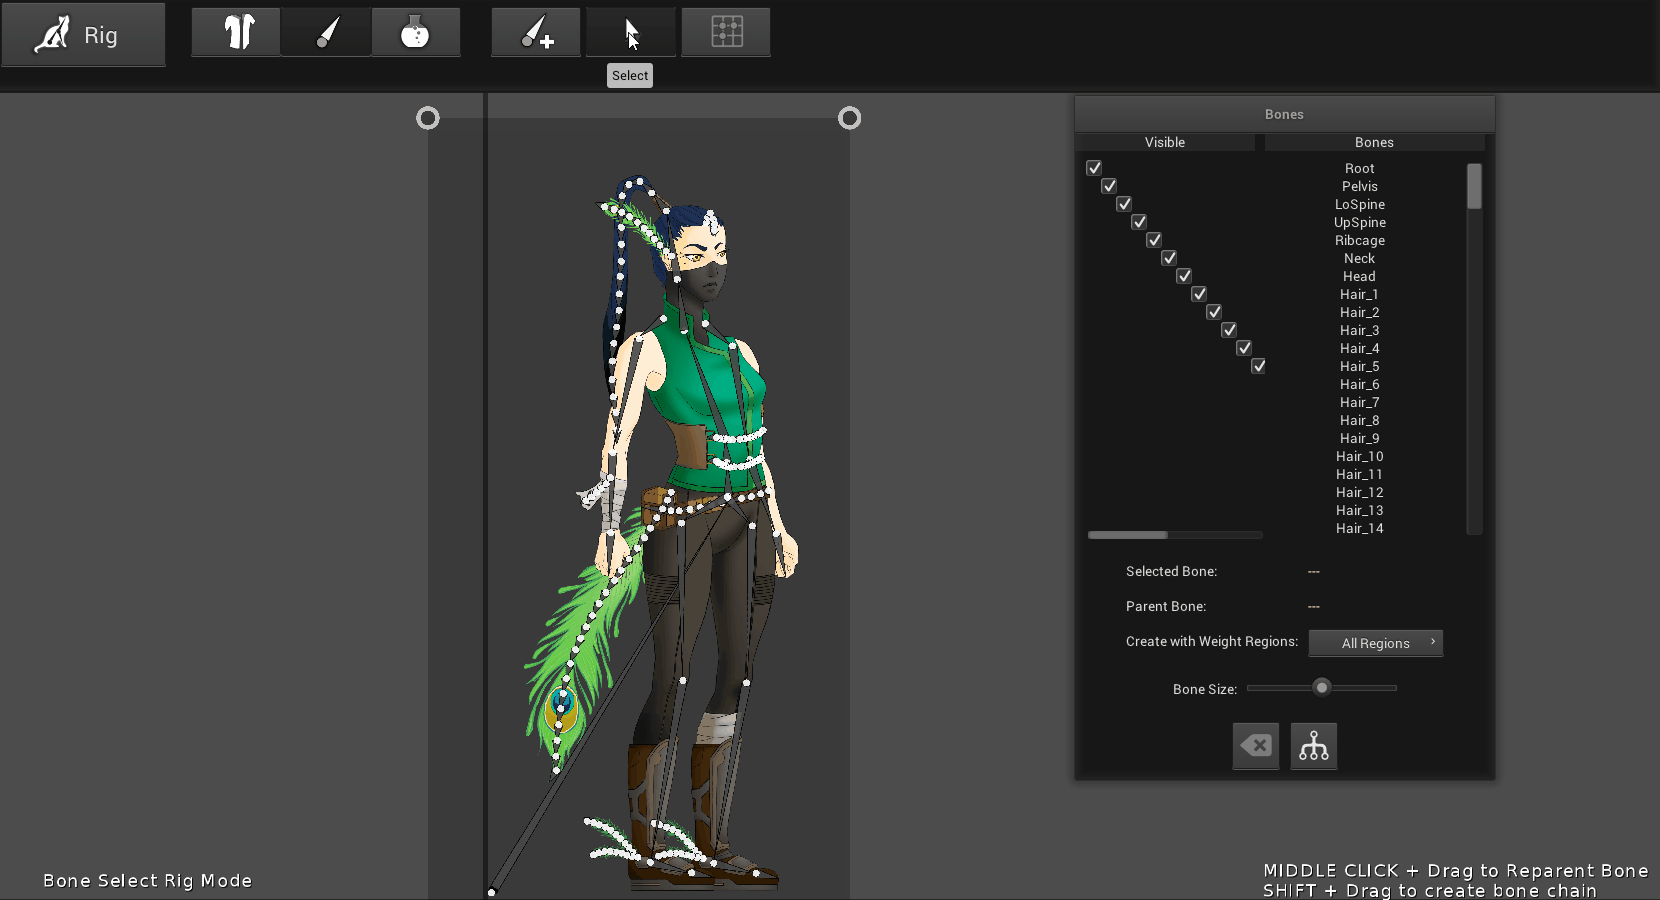
You can quickly check which mesh regions are assigned to a selected bone by looking at the upper-left corner of the main Creature window. Make sure to double check every bone before weighting.
Step 4: Add Weighting
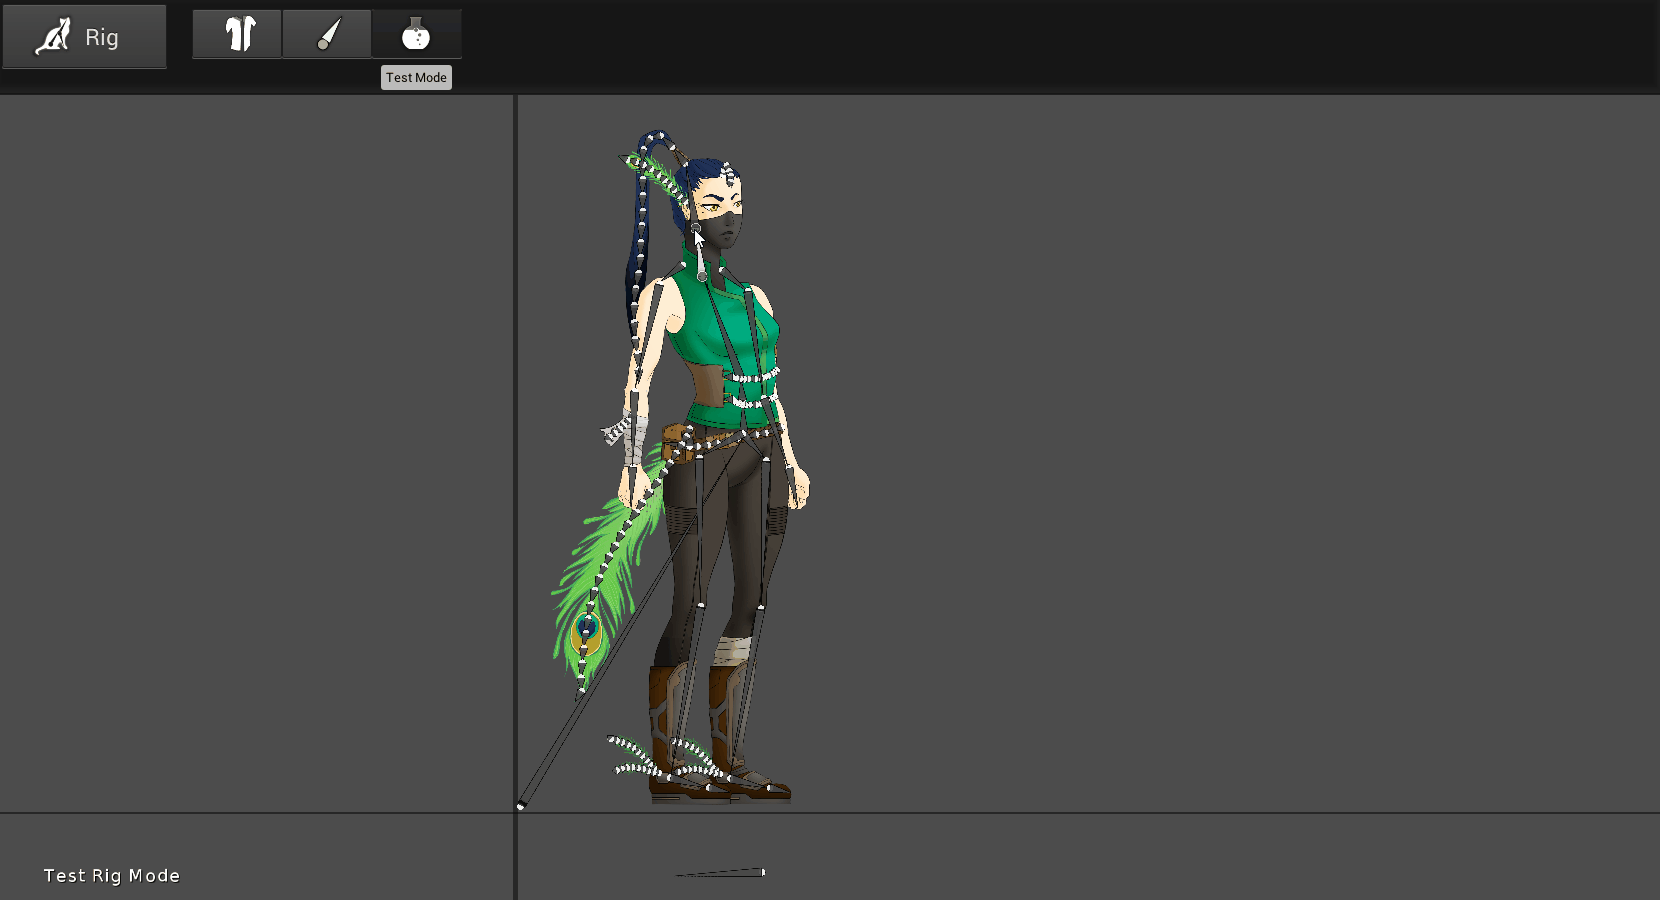
Now that all our mesh regions are properly assigned we will begin to weight our character. As you work, you can use Test Mode to see if your weighting is functioning the way you’d like it to.

We’ll cover three methods for weighting using Creature 2D: Smart Weighting, Auto Weighting, and Manual Weighting. I recommend using a combination of manual weighting and another technique to get fast, high quality results.
Method 1: Smart Weighting
When I first started weighting in Creature, I found this method to be the easiest. Simply select the “Smart” tab towards the bottom of the Bone Weighting window and click “Apply to All”. Creature is able to get a surprising amount of accuracy with this automated tool.
Smart weighting will work best on simpler characters without too many overlapping mesh regions. Aside from some polish you might even consider the weighting done as a beginner.
This tool can also be used to evaluate whether your mesh regions are properly assigned. In the example above, you can see the mesh regions for Pluma’s eyes and her bangs are red. I found that I had assigned her bangs to the head bone instead of the bones for the bangs. After assigning the bones to the proper mesh regions, I ran Smart weighting a second time. The eyes, remained red, despite being properly assigned to the head bone. This means I had to weight them manually.
Method 2: Auto Weighting
Auto Weighting allows for quicker iterations and more control compared to Smart Weighting.
At the bottom of the Bone Weighting window, select the “Auto” tab to use this method. The Auto menu contains three sliders for “Iterations,” “Radius,” and “Influence.”
The** Iterations slider** is what determines the quality of your auto weighting. Keep the Iterations slider at 100% unless you are experiencing computer performance issues.
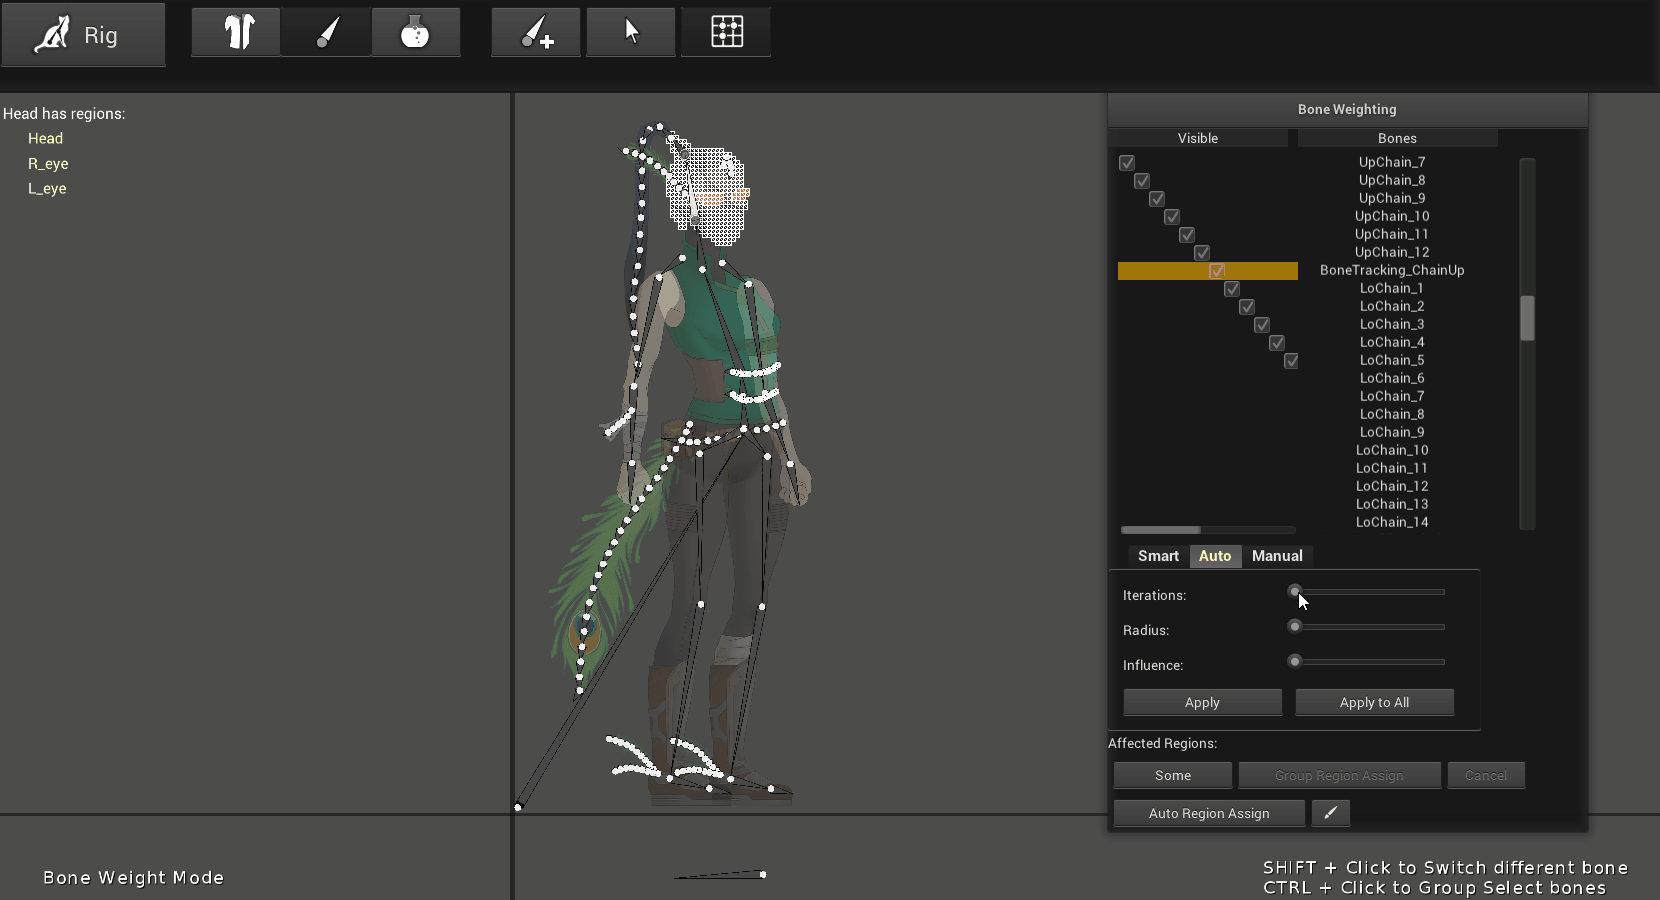
The Radius slider allows you to control how much area surrounding the bone to apply weighting to.
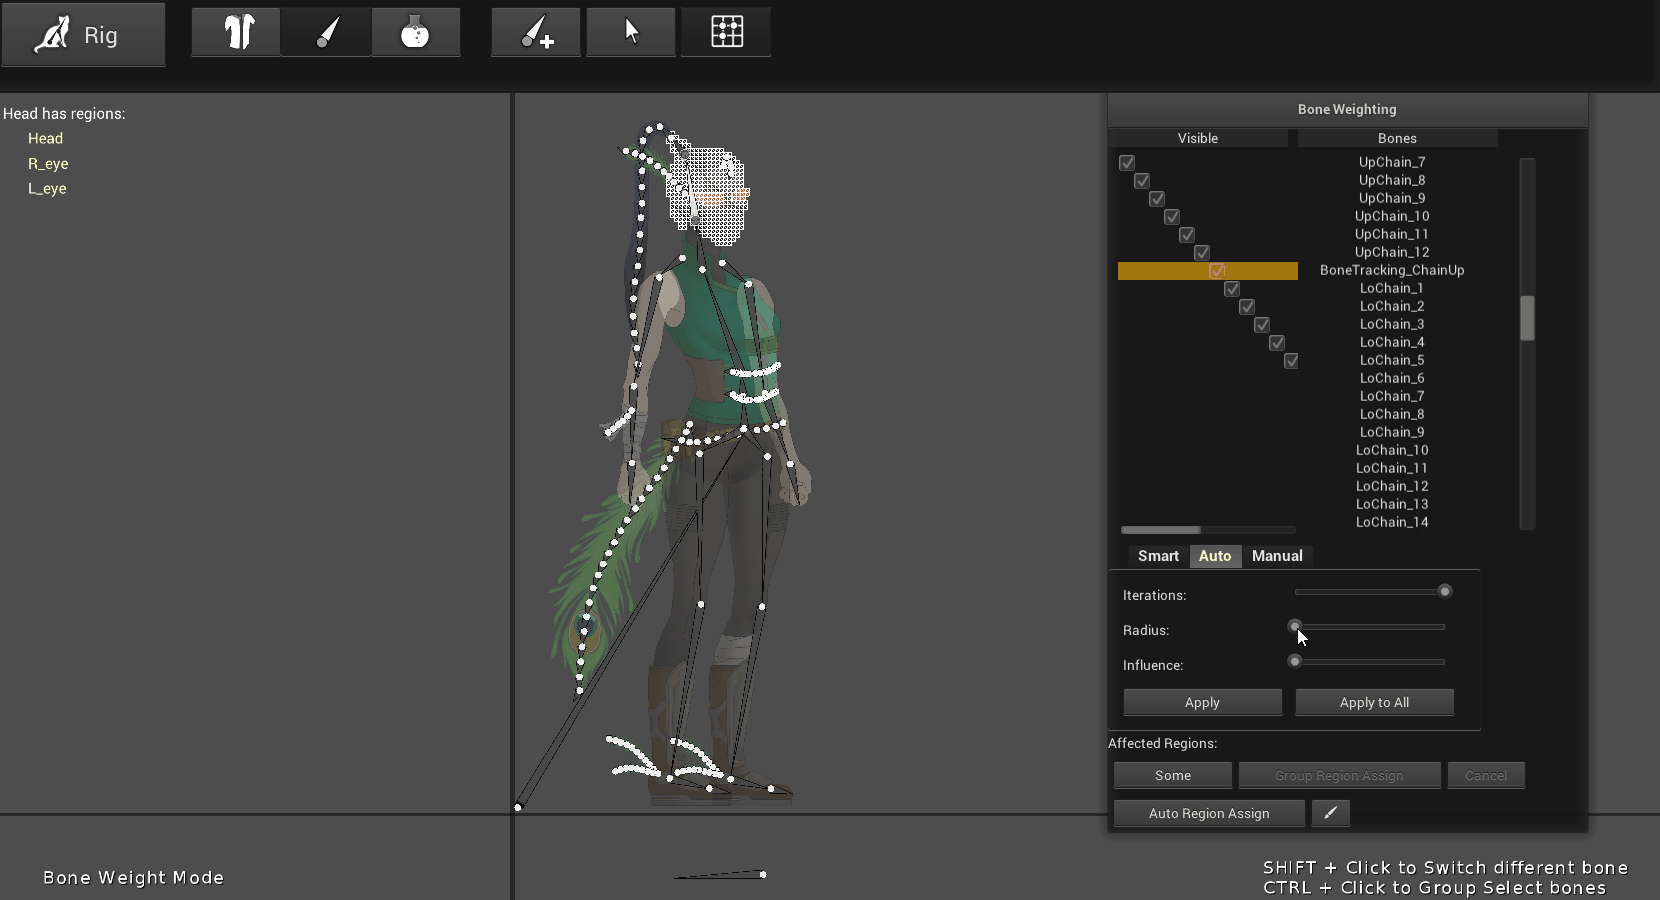
The Influence slider allow you to add a gradient of influence around the Radius Slider. When set to 0%, the weighting will only be applied within the Radius slider. When set to 100%, a substantial area around the Radius slider will have gradient of influence.
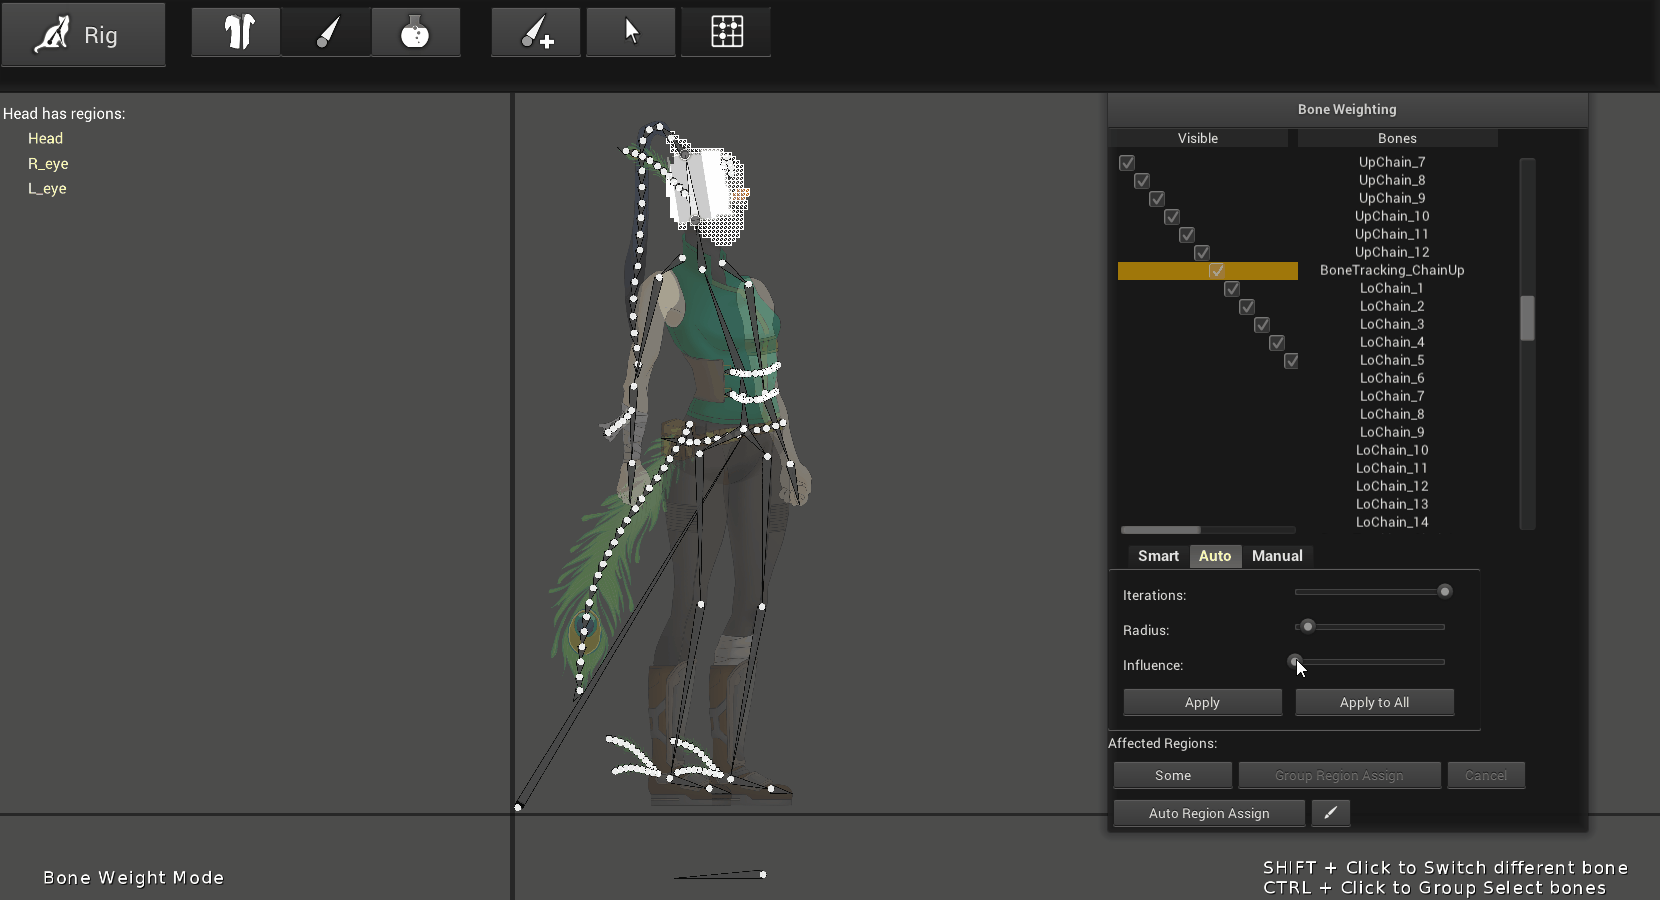
Auto Weighting is perfect for making adjustments to a long chain of bones such as for hair, chains, and feathers. Utilizing the Influence Slider provides a quick way to make precise adjustments for bones that are very close together that are difficult to refine with Manual Weighting.
Method 3: Manual Weighting
After using the Smart Weighting, I personally like to jump straight into the “Manual tab.” Manual Weighting allows for the most overall creative control, which can add needed polish to the other weighting methods.
The first slider under Manual Weighting is for “Radius.” This determines the brush size you will use to manually paint weights onto the mesh regions.
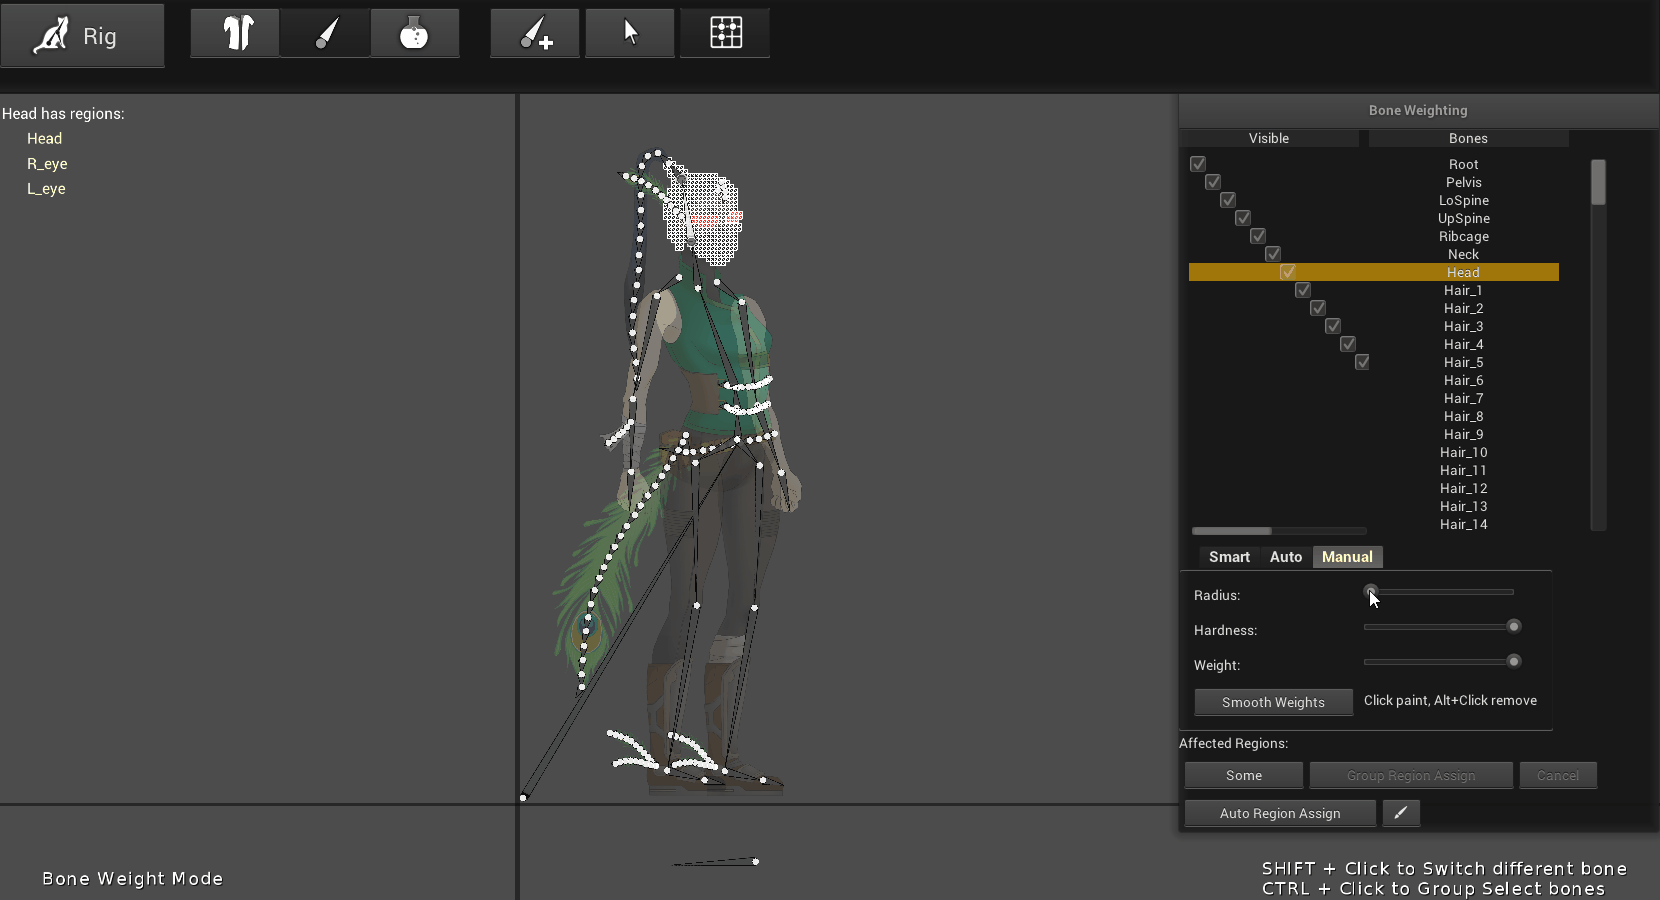
The “Hardness” slider determines how sharp the edges of your stroke are. At 0%, you will find a gradient within your brush stroke, at 100%, each stroke will be uniformly strong within the painted area. I generally prefer a lower percentage for smoother transitions. However, I utilize 100% for mesh regions made of rigid materials, like for metal shields that don’t need to bend or stretch during animation.
After painting, you can also use the “Smooth Weights” button at the bottom of the Manual Weighting tab for smoothing hard edges and making transitions more seamless.

The “Weighting” slider is used to define the strength of your brush. The strength of the weighting is represented by the brush brightness. If you paint weights with a value of 0% you are removing the weighting applied to your current mesh region for the selected bone. Removing weighting all together can have undesirable effects, so I try to always use an additive value.

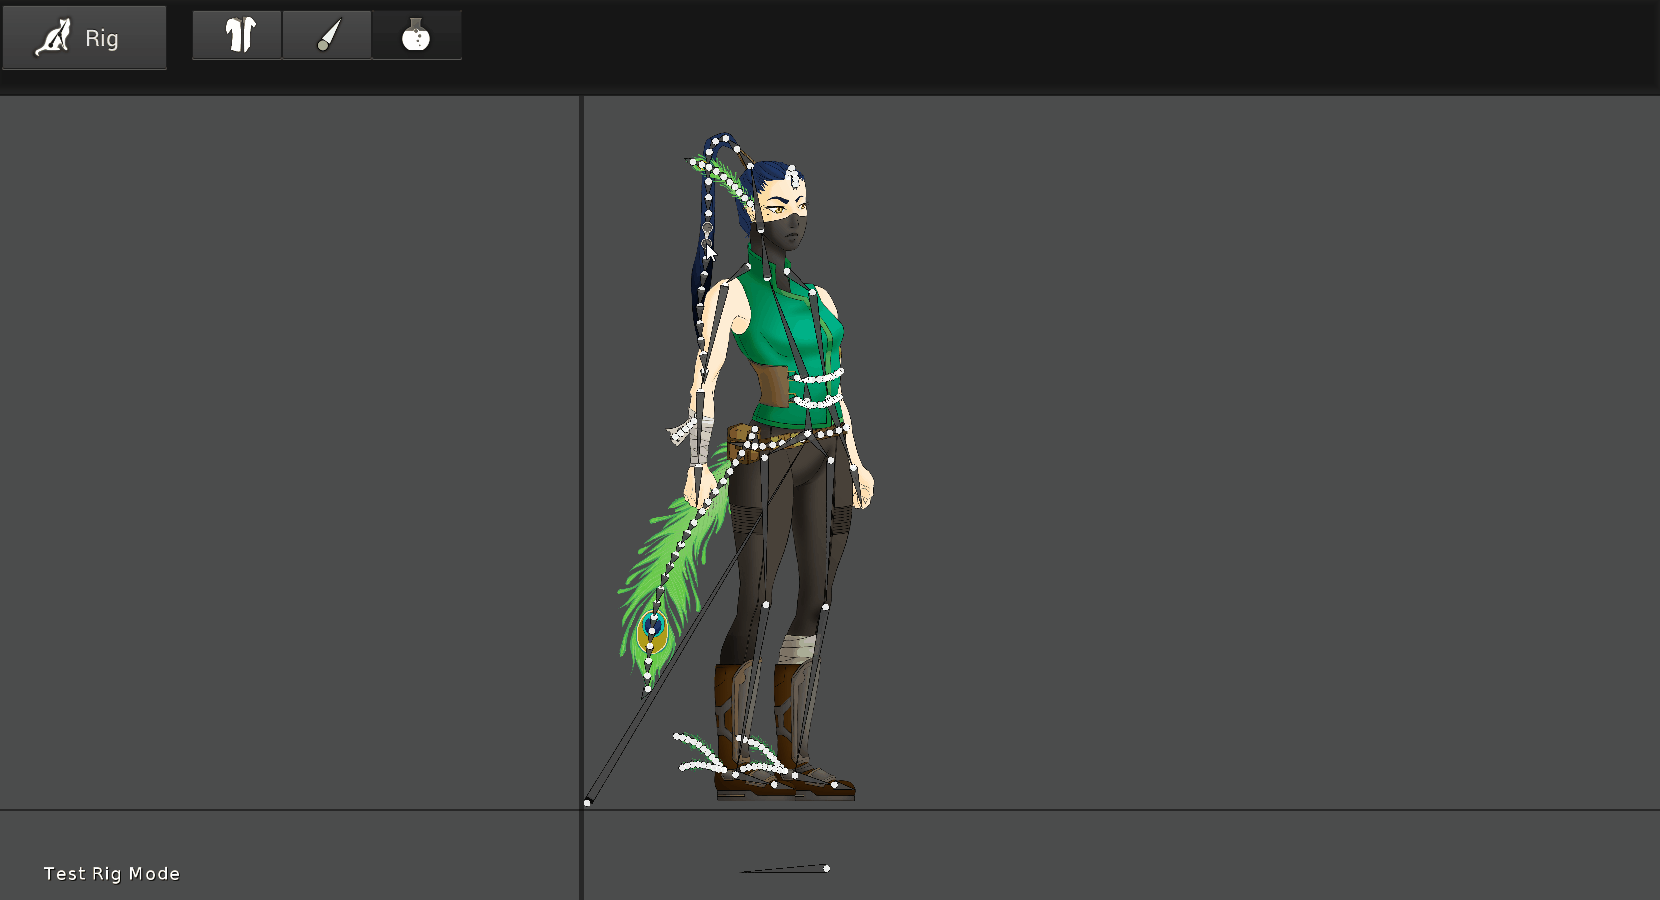
Step 5: Test Your Rig
After painting your weights enter Test Mode to check your progress. Select the center of the bone you want to rotate by clicking on it. Then click+hold+drag the thin end of the bone to rotate it and test your rig. Your character will revert back to their original pose as soon as you exit Test Mode.
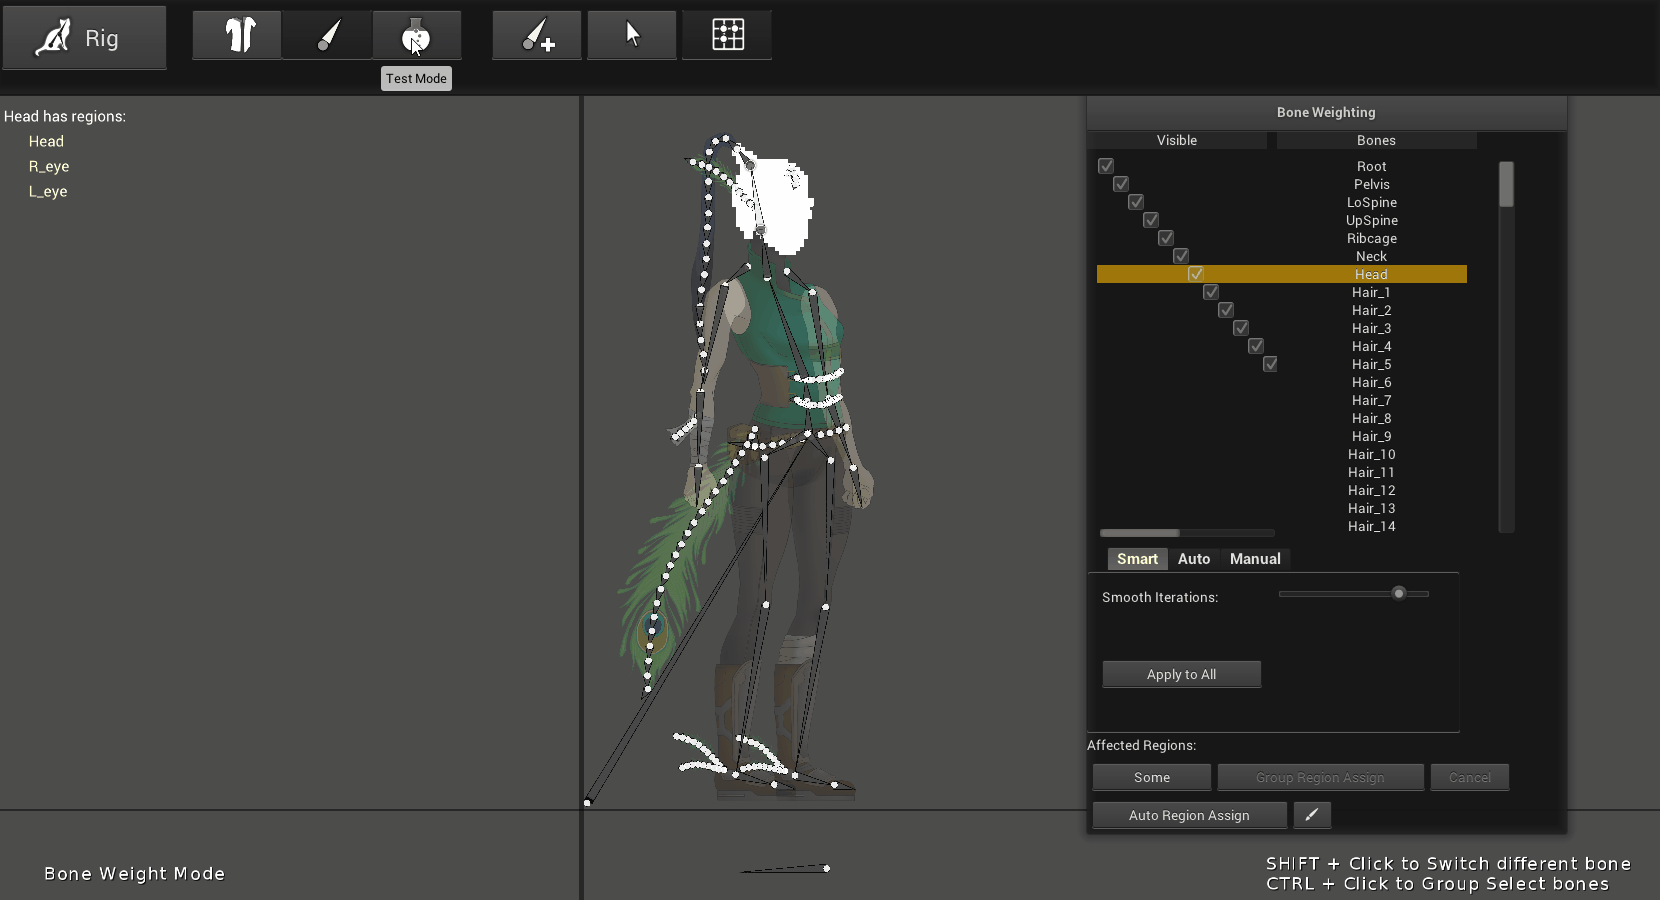
If you see part of your character is missing, that means they have not been assigned or weighted properly.

The results you get in Test mode are slightly different from what happens during animation; when animating, your bones will rotate along the joints without stretching. Testing the look of your bones when they are extended is useful for areas that will need to be more fluid such as hair and feathers.
Step 5: Complete Weighting
Make any final adjustments to your rig. Thankfully, it doesn’t need to be perfect, even after you start animating your character you can always go back to Rigging to adjust the weights.
And always remember to save your work!
Atlas of Creature Tools Used
Assign Regions
- Bone Weighting Window: View of the bone hierarchy that highlights the associated mesh regions and provides tools for weighting.
- Region Assign: The process for determining the mesh regions a bone can influence
- Auto Region Assign: Allows Creature to automatically determine the mesh regions a bone can influence for the entire bone hierarchy.
- Bone Weight Affected Regions: Window that allows you to choose the mesh region(s) associated with the selected bone.
- Group Region Assign: Choose mesh region(s) associated with a group of selected bones.
Add Weighting
- Test Mode: Use this to rotate and move joints to check if you have a proper bone hierarchy and weighting. Any changes made while you are in Test Mode are temporary.
- Smart Weighting: Automates the weighting process across all mesh regions
- Auto Weighting: Allows for fast weighting with the control of a few parameters.
- Iterations: Determines how much processing power to use when using Auto Weighting. Keep it at max unless Creature is running slowly on your device.
- Radius: Determines how far the weighting will spread
- Influence: Affects how much the weighting fades of from the the radius
- Manual Weighting:
- Radius: Determines the size of your weighting brush
- Hardness: Affects how much your weighting fades from the center of the radius
- Weighting: Adjusts the value and strength of your painted weights from black (0%), to gray (50%), to white (100%)
- Smooth Weights: Automates a more gradual transition between two bones. This results in more faded or feathered edges.
Up Next
Check out our next lesson covering Animation Mode and Motors here.
Creature animation software free download is available here! Students of this tutorial can use the code DMCreature101 for a free 30 day license, redeemable here.